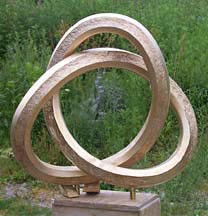
Endeavor
The Towamencin Corporate Center
Lansdale PA
The Towamencin Corporate Center comprises two office buildings and a family-oriented theme restaurant. The office buildings offer modern, technologically advanced amenities for its corporate tenants. Set on 30 beautifully landscaped acres, the Center is located near the Lansdale Interchange of the Pennsylvania Turnpike, just north of Philadelphia.
The Towamencin Corporate Center is built and managed by Trefoil Properties, Incorporated, a diversified regional estate firm that focuses upon the creation, development and management of quality real estate projects in the Mid-Atlantic States.
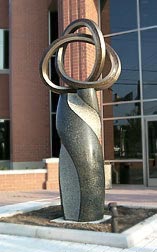
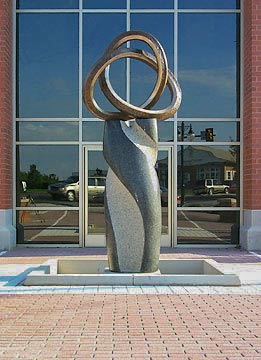
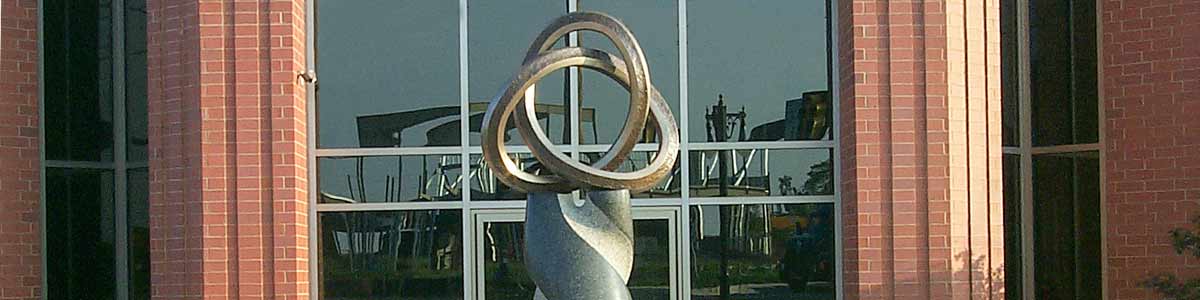
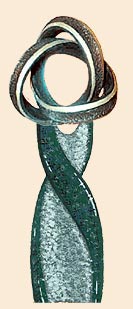
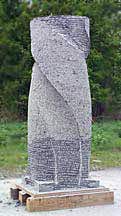
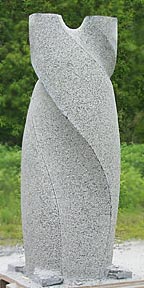
The bronze and granite sculpture Endeavor stands in front of the building.
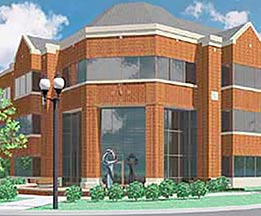
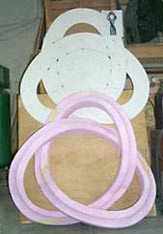
Architect's Drawing
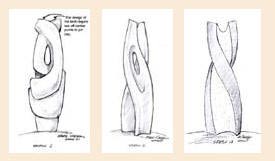
A number of sketches were made, and then a composite rendering for the granite base design.
A more accurate rendering for actual production.
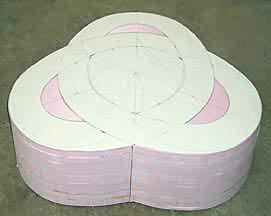
I drew a template of the ribbon motif on cardboard. Since the design is symmetrical, the material selected had to be able to hold its shape, but also be worked quickly and easily. I chose to glue up sheets of pink foam insulation.
The pattern was cut out with a band saw.
I carved out the intertwining ribbon shapes. I refined them with rasps and coarse sandpaper.
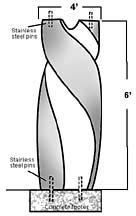
The sculpture's size is 4'x 4'x12 1/2".
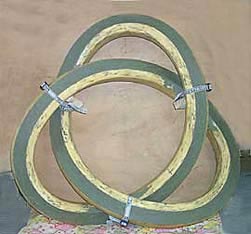
I gave the foam a hard shell by covering it with a thin layer of Durham's Wood Filler. The wood putty, when mixed with water, applied easily with a palette knife, but dried extremely hard, and could then be filed and sanded.
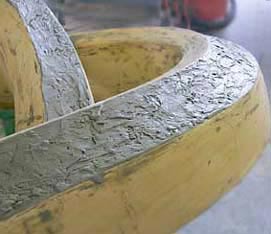
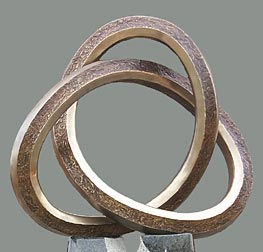
I applied a layer of plastiline clay to produce a texture on the inside concave bands. When cast in bronze, the textured areas will receive a dark patina, and the smooth areas will be polished to a shiny finish.
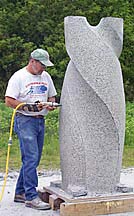
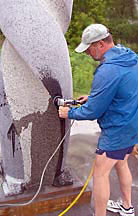
Carving the Granite
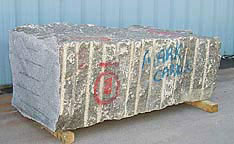
I ordered a block of green-gray granite, called boreal green, from a quarry in Quebec, Canada. I had specified the exact size, 6'x2'x2', of the proposed sculpture; however, it arrived much larger than I ordered. Fortunately, they cut a flat bottom for me.
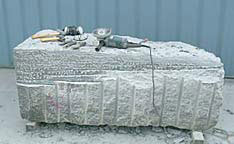
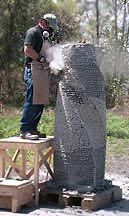
I had to remove 6-8 inches on all four sides of the stone. I used the pitching tool to knock off large chunks on the edges. For the rest, I made parallel cuts with a 7 inch diamond blade on a grinder, then broke the rows off with a hammer and point chisel.
It was slow, exhausting work, but I gradually began to square off the sides and get it down to the right dimensions.
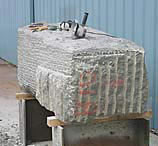
With the block roughly squared off, I rounded over the corners to start forming a cylinder.
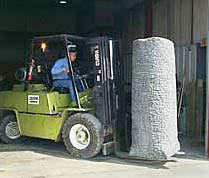
The block had arrived much heavier than I expected - 5 1/2 tons! It was too heavy for me to handle in my studio. Fortunately, I could re-locate the granite to the parking lot of a large machine repair shop, Frederick Machine Repair, in South Buffalo NY. They were able to easily move the stone with their fork lift.
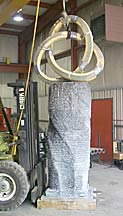
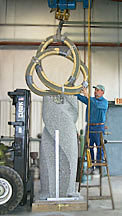
After making the molds and waxes from the master model, I taped the pieces back together with duct tape. Using Frederick Machine's bridge crane, I raised the model up on top of the stone for a trial fit to see where it would contact the stone.

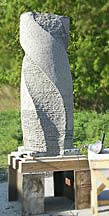
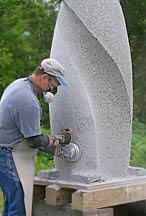
After shaping the stone into a cylinder, I cut in concave grooves to start forming the spiral.
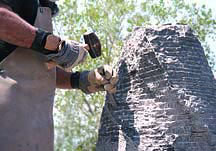
The diamond saw cut parallel lines. A point chisel broke off the rows between the lines. While a laborious, slow process, it is still the fastest way to remove granite.
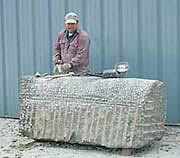
With most of the excess stone removed, I switched to a pneumatic hammer and a 4 point bushing tool.
Detail of bushing tool texture.
Pneumatic tools now removed the saw ridges and smoothed the stone's surface.
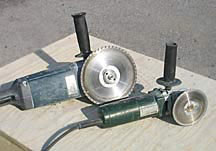
A large grinder with a 7 inch diamond blade cut grooves in the granite to remove excess stone in the most efficient manner. A smaller 4 1/2 inch grinder cut in edges and drew the spiral lines on the stone used as guides.
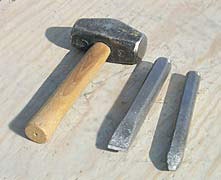
A hammer and point or flat chisels broke off the stone between the grooves cut by the saw.
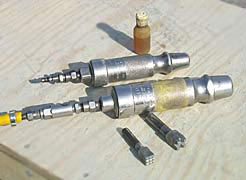
A large 1 1/4 inch Dallet pneumatic hammer and a 4 point bushing tool surfaced the stone.
For retaining stone edges, a 1 inch hammer and a 9 point bushing tool provided more precise shaping where the larger hammer would have chipped the stone.
Progress over three consecutive days of work.
The re-assembled model is placed on top of the granite to check for the two connection points with the bronze and to see how both elements work together.
I carved out a notch in the top to open up the form.
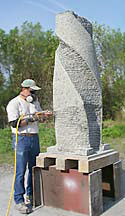
I have completed going over the entire surface of the stone with the 4 point bushing tool to establish the final shape.
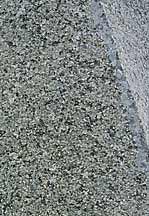
The bushing tool pulverizes the granite crystals, leaving a rough texture. The cup grinding wheel grinds down that surface, leaving a smoother finish.
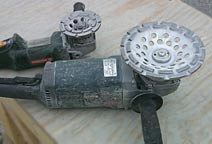
Here are the 4 inch and 7 inch diamond cup grinding wheels I used. The small rectangles contain industrial diamonds in a hard matrix.
After the entire surface has been prepared with the cup grinder, I begin the polishing process. I start with a 40 grit pad containing industrial diamonds. Water washes away the dust.
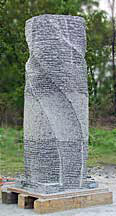
Polished to 400 grit. The nature of the stone is beginning to show.
Polished to 3,000 grit. At this final grit, the stone has been given a lasting high-gloss finish, which reveals the stone's color and crystalline structure.
The Bronze
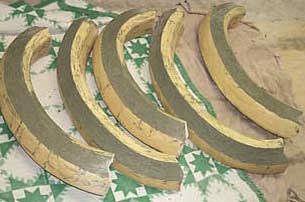
I took my model to a small foundry near St. Catherine, Ontario. They cut my foam model into six sections. Plaster molds were made around each section.
Melted wax was poured into the plaster molds. After the wax cooled, the molds were opened revealing a wax replica of the original model.
Since the foundry did not have the skilled personnel to do the chasing, I took the wax castings to my studio where I cleaned up any imperfections.
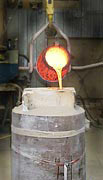
The waxes were encased in investment (plaster and sand mixture). The wax was melted out of the investment mold leaving a hollow cavity into which molten bronze is then poured. The molds are allowed to cool before breaking away the investment material revealing the bronze castings.
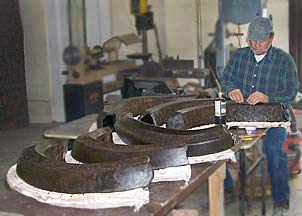
Back at Frederick Machine, I finished the chasing. I ground out any imperfections and spot welded the six sections back together.
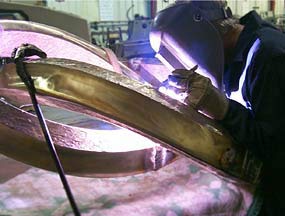
Alan Frederick did all the structural welding. So that the welds would match the bronze in the castings, we cut an ingot of bronze into strips with the band saw, and Alan did an beautiful job of TIG welding the sections together.
Chasing the bronze.
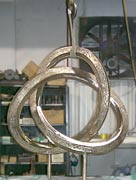
The bronze is sand blasted to prepare it for the application of a patina.
The foundry applied the patina and the wax sealant.
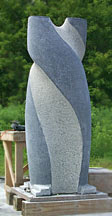
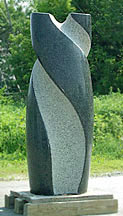
Endeavor Installed
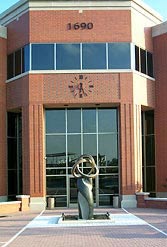
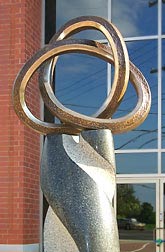
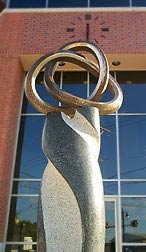
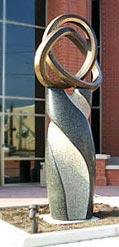
The sculpture is installed in front of the building. Flowers will be planted around the base.
The bronze is pinned and glued into the granite with 1 1/2 inch bronze rods welded into the sculpture.The granite is glued to the concrete footer and secured with two stainless steel pins.